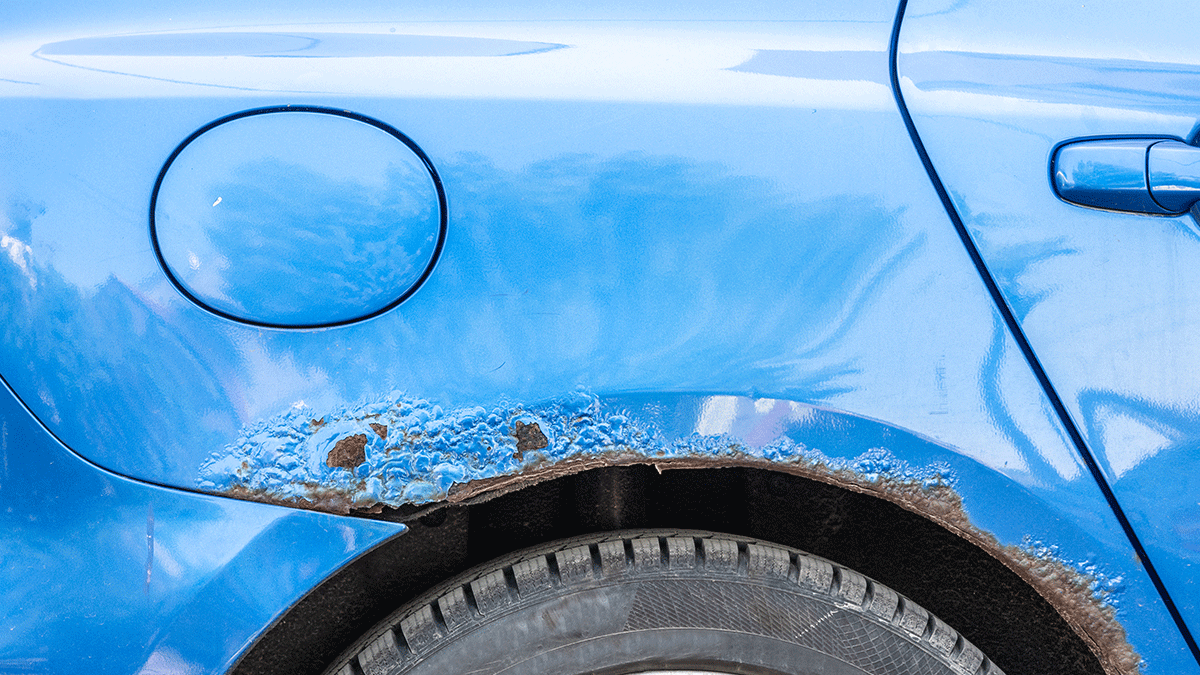



Most vehicle-restoration projects eventually run into rust. At some point you’ll need to repair rust holes or rusty panels. For starters, it’s unsafe; once rust starts, it tends to spread and eventually weaken the vehicle’s structure. And it looks horrible. Here’s how to fix rust on a car.
To provide tips on removing rust from a car and welding in new sheet metal, we reached out to expert welder John Ward. He boasts 30 years of welding experience, including time running his own contractor business. Today, he focuses much of his time on writing articles for his website (kingsofwelding.com), although he still works on projects in his workshop when possible.
Fix rust on a car: cut out the rusted area first
Before welding, identify the full area of rust on the metal. Use a sandblaster to remove the paint on the metal until you can clearly see the clean metal that surrounds the rust.
Once you’ve identified the area of metal you want to replace, remove it from the workpiece and replace it with an exact cutout of steel. Ideally you want to leave as much of the original metal as possible, provided it’s in good condition.
Think carefully about the shape you’re cutting out; curved areas will be harder to replace than flat, and you want to have a simple shape. If possible, cut out a simple rectangle that’s easy to replicate.
There are a few different ways of doing this.
- One option is to measure a piece of sheet metal to fit the area you want to replace. Once you’ve cut out the plate, place it on top of the rusted metal. Then mark around the edge of the plate with a scribe. When you mark metal, using a scribe is most accurate. You can use a Sharpie, but they are quite wide and don’t accurately tell you where to cut the metal.
- Another option, which I prefer, is to cut out the piece of rusted metal and measure another piece of metal to match it. Often, the rusted metal won’t be on a completely flat surface, so it’s best to cut out some thin cardboard to measure the exact area. Then, place the cardboard on your flat sheet metal and measure the correct area. Once you’ve removed the rust and measured out the replacement metal, you’ll need to weld it into place.
Video transcript: AMSOIL Signature Series: Weaver Customs
I really take pride in being able to visualize what that car is going to look like in the end result. Hey. How’s it going? I’m Randy Weaver from Weaver Customs here in West Jordan, Utah, which we specialize in 1972 and down hot rod muscle cars and customs.
Come on in. We’ll check out the shop. This is where all the magic happens in this humble little area. You can see it’s just nothing but hot rods.
Okay. Check this out. What we have here is a 1941 Dodge* Military Power Wagon. They only made them for a few years.
[ Music ] I decided to do one of these just because it was rare, and I’ve always wanted to do something military, you know, related just, you know, because I like the military. And I just felt it would be the perfect rig to build. Instead of an all-original power wagon, I wanted to do a more modernized setup. So, like, my suspension is all 4-bar with Fox 2.0 shocks, and then I custom made the whole bed.
As you can see, everything’s smooth. And then the two-tone, you know, the gray over the black just kind of kept it that military-ish truck-ish type feel. The wood bed in this thing is just killer. So it is a Brazilian hardwood which finished out really cool, and then Ogden Chrome did all our brushed nickel accents.
The interior’s probably the favorite — my favorite thing in the whole truck. So it’s all black. Headliner’s all black leather. I put leather floorboards with 1911 Colt 45s in the floors.
So that is — that is probably one of my favorite things just because I like guns and military and stuff like that. And I can show you the engine over here. Just a super-clean single-turbo 4-cylinder Cummins*, probably makes like 350-ish horse so real mild. So just — yeah.
Super, super simple and clean. And then over here what we have is a 1968 Chevy* Caprice. [ Music ] And what I’ve done is you can see all — like, I did all the metalwork. This is all metal.
People think everything’s fiberglass like the splitter and then the hood. I chopped this bumper into probably four or five pieces, made it all one piece, tucked it in and made it just super slick and modern. The suspension is all RideTech, you know, 4 wheel disc brakes, 14-inch brakes on it. I can show you this under the hood.
And this goes back to more metalwork, and it’s kind of an artwork, you know, masterpiece being all metal and it’s not fiberglass which is — you know, I pride myself in metalcrafting. I don’t like just, you know, fiberglass. I just think metal is more of a challenge, if you will. But, yeah, it’s powered by an LSA 600 horse LS 6.2 liter.
So, yeah, just something really cool, you know? When you pop the hood, it’s kind of like a jewelry box, you know? Just really slick and neat. Then we can wander around to the back, more metalwork as you can see.
Tucked the bumpers really super, super slick. So what I did is I handcrafted everything, molded — hand-molded all this to where it was all steel in one piece and then made all my tail wing back here all in steel which tied in just super bitching to the car. You know, I visualize a whole car sitting here being smooth and perfect. It looks like it’s going 120 miles an hour sitting still.
It’s kind of my vision on every build. Okay. Check this out. So this 1964 International is my shop truck.
You know, and I think every hot rod shop should have a cool, cool hot rod truck to drive around, get parts in, tow your hot rods. [ Music ] This truck here in particular has a really cool story to it. I found it in Cheyenne, Wyoming, sitting in a field. 1982 I think was the last dated tag on the truck, so it sat in that field forever.
So I drug it home, updated all the suspension so it’s all Mustang* II, 9-inch Ford* with 4-bar, RideTech adjustable coil-overs, you know, 4 wheel disc brakes, tuck 22s all the way around which is really neat. You know, you wouldn’t think of tuck 22s riding static. And static I mean it’s all on coil-overs, not on air. And I still pull a trailer with it.
Just a real functional truck. Every modern kind of add-on you can build a vehicle with, this truck has but yet still looks really old and patina. You know, it has the perfect patina on it. But I put a big Cummins 12-valve 6-cylinder in it, made 650-ish to the ground and upwards 1200 foot-pounds of torque.
The truck weighs 4400 pounds so, believe it or not, the truck is super, super fast. This here is a really cool piece here. So my dad had this swan probably late ’60s, early ’70s. And he passed away just not too long ago.
And so I said this belongs on this work truck just for the fact I can just look at it every day. So this truck and everything on this truck has a really cool history to it. I took a passion for building cool stuff and finding out what I can do with my talent to make this stuff work. To see where they start from to that finished car out there is why I like to do it.
It just pays off in the end for the finished product. Hey. Thanks for stopping by the shop. I’ve got to get back here and get to work on this Mustang.
Take care.
Which welding process to use?
When fixing rust on a car, the two best welding processes you can use are MIG and TIG.
MIG is the most popular method because it’s simpler, quicker and more cost-effective. But TIG is a great option because it allows more control and produces cleaner welds.
MIG welding
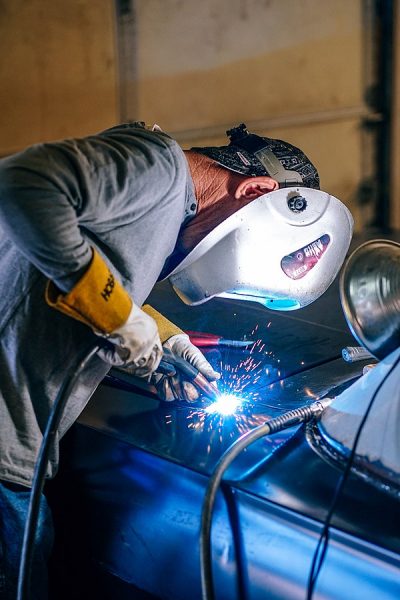
When MIG welding, leave a small gap between the new metal and the original metal for the filler metal. For your shielding gas, you’re better using a CO2 and argon mix than CO2 alone since you don’t need aggressive penetration.

TIG welding
If you’re using a TIG welder, you won’t need a small gap and you want the patch metal to be as tight a fit as possible.
TIG welding is a more difficult process to learn, but will produce a softer weld that’s easier to hammer and dolly without the weld cracking. You’ll also be using a lot lower amperage, so there’s less chance of the metal distorting from overheating. TIG welding is a more intricate process, so I’d only use this if I’m worried about distortion or the weld cracking under hammering. MIG still produces great results.
Weld the patch in place
Make sure the panel fits the space as well as possible. The metal also must line up as well as it can and be flat on the top and bottom. If the metal isn’t flat, then when you grind it down you will simply make the metal thinner and weaker.
Once the metal is in place, tack weld the corners and the areas where the metal fits most perfectly. You can then weld the full patch of metal. Take your time when welding to avoid overheating and distorting the metal.
Don’t just set the welder to high amperage and go around the edge continuously. Weld different areas around the perimeter until the whole edge is securely welded. Try placing a wet cloth on the metal between welds to keep it cool.
Grind the metal
When the metal has been welded solidly, grind down the filler metal and remove any slag. You don’t need to apply too much pressure when grinding; just make it nice and smooth. Keep the head of the grinder flat at all times and, when you’re finished, you should have a new rust-free piece of solid sheet metal that’s ready to paint.
Welding autobody is fun, and it isn’t that hard to achieve great results. Try practicing on some old metal before you dive in, but don’t be afraid to give it a try.
Recommended AMSOIL products
Start with AMSOIL synthetic motor oil and find the exact AMSOIL products for all your vehicles with the AMSOIL Product Guide.

Comments
Brad Nelson is an AMSOIL Technical Writer II who develops content about lubricant technology, product performance and vehicle maintenance. He works with engineers and product specialists to translate testing, application requirements and approved performance claims into clear customer guidance. Nelson’s work includes AMSOIL Blog articles, AMSOIL Magazine features and technical explanations concerning motor oils, gear lubricants, vehicle systems and maintenance practices.
Share: