Fall is fast approaching, which means if you’re an avid hunter, you’ve already been out kicking the bush testing your skills. Because I work during the week, I suppose I can be considered a weekend warrior – not too uncommon among us hunting kind.
That said, you never can plan great weather on the weekends, so we play the hand we’re dealt. At times, depending on what I’m chasing, bad weather is music to my ears. No matter what you are up to or when you do it, there is one thing I can promise: a successful hunt begins with a properly operating gun. In the video below, we show you how to clean a gun.

Video transcript: AMSOIL: How to Clean Your Shotgun
After a beautiful day of bird hunting with the pup, one of the important things to do is gun maintenance. You know, you can go out, shoot a couple boxes of shells. There’s a lot of spent powder in the barrel and the receiver. You need to get that stuff out of there so the next time you load some shells in and a bird gets up in front of you, you don’t go “click.” So what we want to do, I’m going to demonstrate here, take this gun apart, clean it up real good so the next time we go out she’s ready to go.
So we’ll spray the rag down here, start cleaning out the barrel. This is the kind of stuff that you’re getting out of the barrel, and this stuff is going to be found in your receiver too. This is the stuff that’s going to gum it up and slow it down. So after we put a nice pass through there with some solvent, we’re going to come back through with a copper brush, spray that with a little bit of solvent as well.
You’re going to run that brush through the barrel a few times. I’m going to go after it again with a little more solvent just to make sure that you get the barrel nice and clean. Typically run one last one through to remove any of the solvent that was in there before we go back after it with some lubrication. Look at the rag.
It’s pretty white. So now we’ve got a good clean barrel. We need to go after the receiver of this thing. So what I’m going to do is just take some of that same cleaner, wipe it on another clean rag.
In this gun, it’s a little harder to take the bolt out without pulling a few pins out, so we just kind of go after it. You can move the bolt back and forth, exposing different parts of the receiver. Make sure that you get that thing nice and clean. After we use our patch with solvent on the inside of the receiver to clean it out, we’re going to go back with a clean, dry one, try to wipe some of that residual solvent back out.
See if there’s any — see if there’s any residual powder left behind. As you can start seeing, a clean white rag goes in; a clean white rag comes out. The gun’s pretty clean. This gun needs to be lubricated now, so what we want to do is we want to make sure that we provide a nice thin film inside the receiver so you get a good smooth action, pull shells and eject shells really good.
And then we’re going to wipe the gun down, get all the dirt out of it from when it’s been out in the field. So, since we cleaned the barrel out, we’re going to want to go back in and give it a little bit of corrosion protection, and that’s where this lube is going to come into play. I’m going to do the same thing with the receiver now, put a little bit of this lubricant on a clean rag, just a thin film, give it a little bit of protection from sliding components back and forth as you’re using it and also to give it that layer of corrosion protection. Go back for a clean rag, a little bit more oil on there and just give a good clean wipe down to the exterior of the gun.
There we have it: a good clean gun, nice smooth action.
Don’t make the mistake of neglecting your most useful tool, as I did a few years ago on a goose hunt in Iceland, which left me frustrated and cussing. Two things will undoubtedly happen at the worst time: click and no bang, or the security you thought you had in that second or third shot of your semi-auto vanishes, leaving you with a single-banger.
Not good when the geese are coming in droves.
Fortunately, I corrected my faulty actions in Iceland simply by cleaning my shotgun. Yes, it was as simple as that, and I was back up and firing dependably.
Hunting is supposed to be relaxing and fun – don’t make it stressful. Clean your gun! Keep reading and I’ll give you a few tips on the cleaning process.
How to clean a gun
Like I’ve said in the past, I’m not a professional hunter or gunsmith. I’m just an everyday guy who likes to pull the trigger. So, my methods are my methods, which may not be your methods. Everyone is different. We all may use different rods, patches, rags, solvents, lubes, etc. In the end, however, what I strive for is a clean, dependable firearm. Probably not too far off from what you hope for in your firearm.
The following tips are based on personal success, not the success or methods of others. While we all have opinions, I think we can all agree that your firearm will be happier if you clean it using this process.
1) Make sure your gun is unloaded
The first and most critical step. People die every year cleaning a gun they thought was unloaded. Don’t be that person. Double check and make sure the chamber is empty. If the gun holds extra rounds, remove them.
2) Have all the tools you need available
I recommend the following:
- Cleaning rod sized to fit the bore
- Bore brush for scrubbing
- Clean rags you can cut up
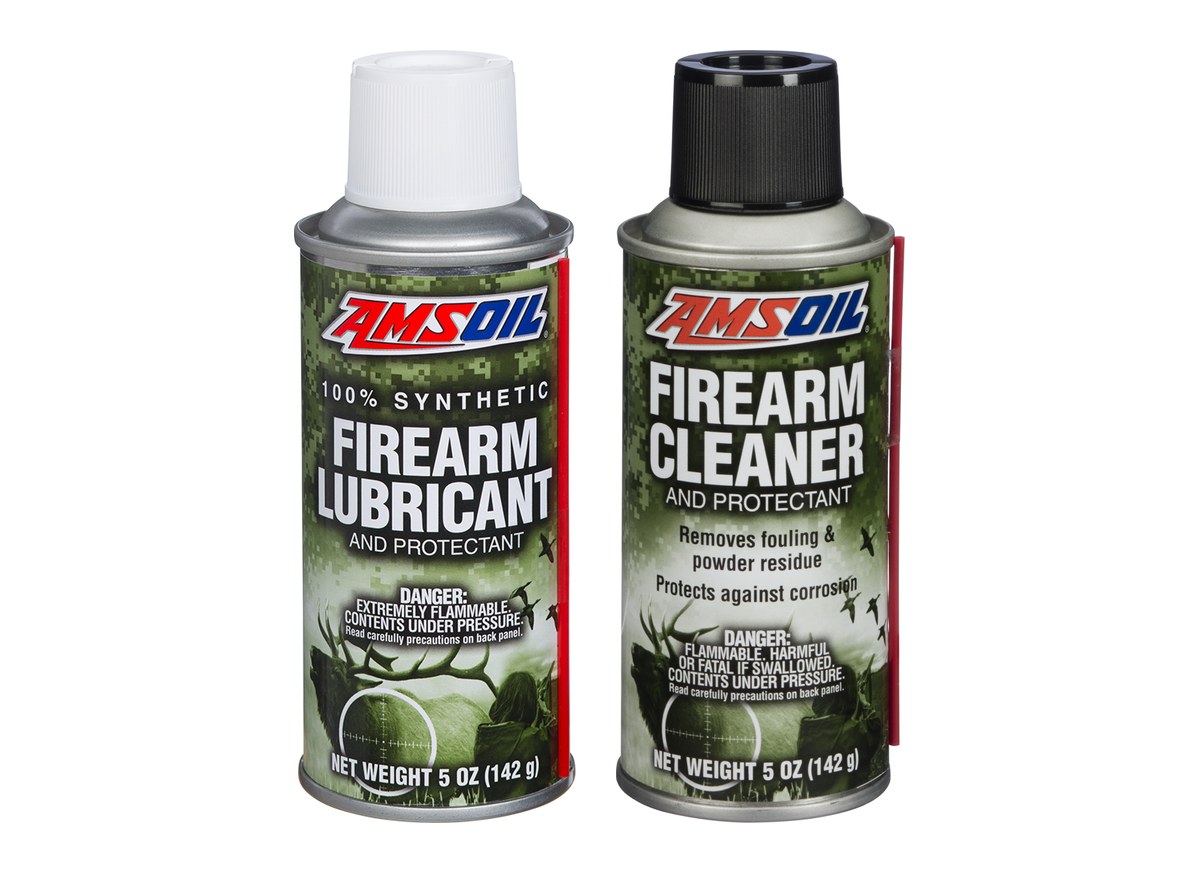
- A high-quality cleaner and lubricant like AMSOIL Firearm Cleaner and Protectant and Synthetic Firearm Lubricant and Protectant
I’m a little biased toward the cleaner and lubricant I use since I helped develop these products and I know they work. You may choose another brand and like it. That’s great; but think about giving these two products a try. You won’t be disappointed.

3) Disassemble your gun
Now that we have all the tools we need, let’s get down to business.
I like to completely disassemble my guns. Sure, if I’m in a rush, I’ll leave them together, but to really clean a gun inside and out, you have to take it apart. Reference your user’s manual since it typically provides instructions on disassembly for cleaning. If you are unsure or worried about putting it back together correctly, leave it assembled.
4) Clean the barrel
I start with the barrel. Spray the inside with solvent. Let the solvent soften the residue and wash it out the end of the barrel.
Then, attach a clean rag to your cleaning rod and run it down the barrel a few times. The rag will help remove residue. Look down the barrel and see if it is shiny and smooth. If you haven’t shot much, it may require minimal cleaning. But, often you have to work a little harder to clean it.
Take the dirty rag off the cleaning rod and attach the bore brush. Spray the inside of the barrel again and run the bore brush through the barrel a few times. Remove the bore brush from the cleaning rod and run another rag through the barrel.
Look down the barrel again. It should be smooth and shiny. If not, repeat this process until clean or until you can run a rag through the barrel and have it come out clean. Once the inside of the barrel is clean, run a clean rag dampened with lubricant down the barrel. I use AMSOIL Synthetic Firearm Lubricant and Protectant. This leaves a thin film on the inside of the barrel as protection against corrosion.

5) Clean the action
Depending on your gun, the action may include several moving parts, and they’re often coated with powder residue. This area is the source of most misfires or jamming issues.
Clean each component of the gun’s action with the same solvent used to clean the barrel. Use a clean rag soaked in solvent to wipe each component clean.
Once clean, dampen another clean rag with lubricant and wipe each action component. The lubricant in this area does multiple jobs. It protects from corrosion and provides the necessary lubrication the action components need as they slide against one another. Without lubricant here, the firearm is exposed to wear, reducing its life and dependability.

6) Reassemble the gun and lubricate external surfaces
Wipe the outside of the firearm with a clean rag dampened with solvent to remove any powder residue, dirt or oil left by your hands. Once clean, take another clean rag dampened with lubricant and wipe all the surfaces. This helps protect the external surfaces from corrosion.
This process is not all-encompassing. It’s possible your user’s manual provides additional cleaning recommendations. Either way you slice it, your gun should be clean, well-lubricated and more dependable than it was before your cleaning process.
I can’t take responsibility for issues resulting in the improper reassembly of your firearm. Like I said, it’s best to know how to put it back together before you take it apart. Or, call your local gunsmith and he’d be happy to help.
Remember, hunting is about reducing stress and coming home with your day’s limit. Don’t let a dirty gun get in the way of that effort. Best of luck hunting this season. Be safe.