Sometimes “tight is right” is all you need when wrenching in the garage. But some fasteners, like lug nuts, valve-cover bolts or an oil-drain plug, require tightening to the proper torque to prevent stripping threads, warping components or freeing critical parts (like your wheels while cruising down the highway) from your vehicle. For those jobs, you need a torque wrench. And in this post, we show you how to use a torque wrench.
Torque Wrench Types
Torque is simply a twisting force that causes something to rotate. A torque wrench allows you to tighten a nut, bolt or other fastener to a desired torque to prevent over- or under-tightening.
There are several types of torque wrenches, but let’s focus on the most common:

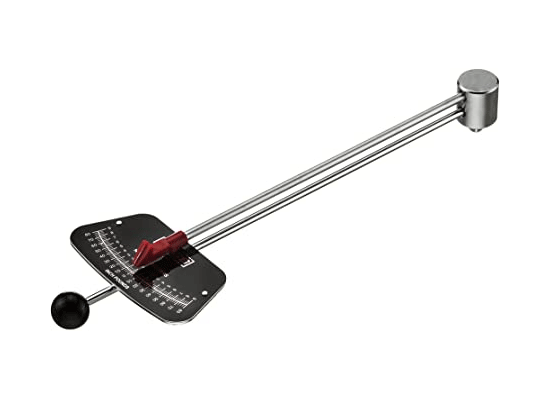
Beam-Style Torque Wrench
This is the most basic design available. It uses a long, flexible beam with a pointer on the end that corresponds to markings on a scale. As you tighten a fastener, the pointer indicates the amount of torque being applied. They provide accurate readings, are easy to maintain and last forever.
On the downside, they’re more difficult to read than modern digital or click-style wrenches. Plus, it can be a hassle to simultaneously apply force to the wrench and keep an eye on the scale if you’re working at an awkward position or in a tight area.
If you’re getting old, like me, you have to fuss with your reading glasses to read the scale, adding another layer of annoyance. Since beam-type wrenches don’t warn you when you’ve reached the desire torque setting with a “click” or “beep,” it’s easy to overtighten a fastener.

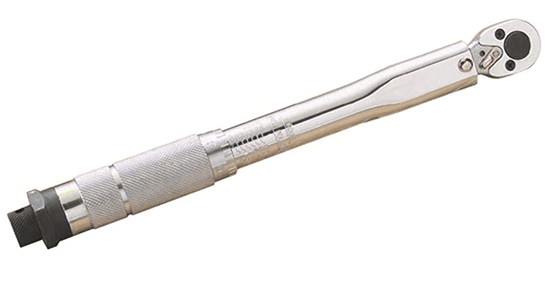
Click-Type Torque Wrench
This is probably the most popular choice for DIYers and beginners since it combines affordability with accuracy and ease of use. Bear in mind that you can’t set rolling torque with a click-type torque wrench; a beam or dial torque works great for that. You set the desired torque by rotating the handle until aligning the proper marks on the handle with those on the body of the wrench.
One of the nice things about a click-type torque wrench is that it makes an audible click when you reach the desired torque. This serves as a red flag that tells you to stop tightening, which helps prevent over-tightening. However, the clicking sound doesn’t prevent you from continuing to apply force, so the key is to stop tightening as soon as you hear it.
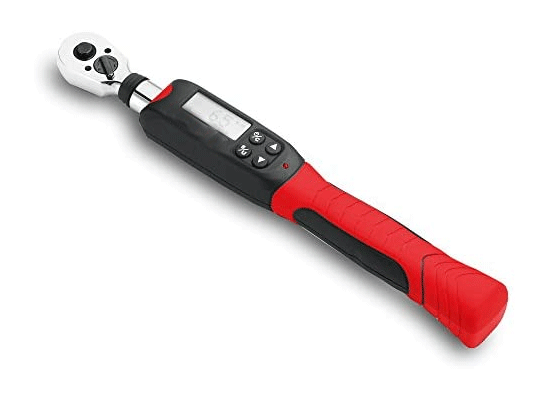
Digital-Type Torque Wrench
This is the most accurate type, hence the most expensive.
Most models allow you to preset multiple torque settings and retain settings as you use it, enhancing convenience. Once you reach the desired torque setting, the wrench warns you with a beep, buzz, flashing light, vibration or some combination thereof. Their advanced notification settings help you prevent over-tightening.
Digital wrenches require batteries and can be sensitive to use, so keep that in mind.
There are other types of torque wrenches, like the slip-type, split-beam type and deflecting-beam type, but the few listed here are the most common and will suit the typical DIYer just fine.

Video transcript: How to Torque Your Lug Nuts
Featuring John Gardner, ASE Master Certified technician, automotive technology instructor and host of Motorhead Garage, with AMSOIL Director of Product Marketing Len Groom.
John Gardner: Now removing lug nuts with an impact gun, no problem. Putting them back on, that’s no place for gun play. Welcome to this AMSOIL Tech Tip. We’re talking about torquing lug nuts to the proper specification.
First off, why do we want to do that? Well, you want to make sure the wheel is secure. That’s important. And second, you don’t want to do any damage to the studs, the lug nuts, or warp the rotor or hub assembly.
Torque specifications are key. How are going to do it? Well, we can use a torque wrench. It’s pretty simple.
And you want to use a torque wrench and go in a star pattern. No matter what your lug pattern is, just go in a star pattern and you should be fine. How do you do it? Well, you set the torque wrench to the proper specification.
You go around to each one of your lugs going in that star pattern. Click, click, click. If you have a click type torque wrench, if you have a digital one, just look at the torque specifications on the gauge. Once you go around, you make sure that wheel is secure.
I like to go around about twice. And why do I do that? And why do we go in a star pattern? Number one, to keep it secure.
And number two, we’re going to distribute that torque equally around that rim in that star pattern. Second, we can actually use these torque limiting adapters. In the industry we just call them torque sticks. They’re like a big torsion bar, really. You can see this one’s really, really thin and the other ones are thick.
They’re different torque specifications. What do you do? Well, that’s nice because you can use the gun, but when you use the gun, have to use the torque limiting adapters on it. Just go around once again in the star pattern, you’re distributing that torque evenly and you’re not doing any warping or damage into that rim.
You hit it about four or five clicks with that gun and then you’re good to go.
Misconceptions when we start putting these things on.
I mean, anti seize, this is great stuff.
Len Groom: It is. And sometimes people like to put that on the lug studs, or they’ll actually put it on the rotor. The problem with that is it’s extremely viscous. It’s very thick.
And what happens is you get all your torque done, and then it squeezes out of there, your tire ends up loose.
John Gardner: And your torque specifications are not gonna be right. Don’t use it.
Len Groom: So we recommend if you want some rust and corrosion protection, use something thinner like our metal protector. Go ahead and spray it on the lug studs, spray it on the rotor. Don’t get it on the rotor surface obviously, but get it where the studs are gonna go. Put your lug nuts on there, you get your rust and corrosion protection, you don’t have any of those problems using anti seize.
John Gardner: Now I’m in Florida, you know, we got salt water and stuff, but you’re up north, I mean, these things get nasty.
Len Groom: They do. They tend to rust on, and you see people videos of people knocking them off with sledgehammers and all kinds of stuff. Just hit it with a little rust and corrosion spray, you’re good to go.
John Gardner: Let me ask you a question. I had the whole hub assembly off and you know the rotor faced to the actual hub. We could spray it there as well because we get some problems there. We get some pedal pulsation or some lateral run out or run out on that rotor. Not a good thing.
Len Groom: No, it isn’t. So once you get it all cleaned up, go ahead and hit it with some of that. You can do the same thing with your rims. If you’ve got an aluminum rim, dissimilar metals, you can see that corrosion in there. This will help that.
John Gardner: Give me that, Len. This one’s coming home with me. You know, there’s a proper technique for putting lug nuts on as simple as it seems, and there’s a proper technique for all your fluid services. And for all those fluid services, just go to amsoil.com.