


Get smart
Start by investing in a shop manual for your classic car or truck. The older the vehicle, the less complex it will be, the easier the work will be, and the shop manual will also be easier to decipher. Vehicle-specific manufacturer shop manuals are in-depth and cover all the basic maintenance tasks but are typically more expensive. Haynes*, Chilton* and Motor* manuals are reasonably priced and cover many years, manufacturers and models but may lack vehicle-specific information.
If you don’t feel comfortable repairing your own vehicle, routine maintenance and inspection will still provide you with valuable knowledge about what needs service before hiring someone else to do the work.
Grease and lube
Grab your manual and get busy inspecting and greasing any fittings and U-joints, bearings, bushings, steering and other mechanical items and chassis components. Regularly topping off grease will prevent premature wear of expensive metal components.
Check manual steering box grease level, which sometimes requires removal of one of the top bolts and sometimes uses a square plug like many transmissions and differentials. Power steering reservoirs usually have a dipstick attached to the cap, which may indicate both hot and cold fluid levels.
Speaking of transmission and differential fluids, now is as good a time as any to check levels and replace them if needed.
Hoses
Good hoses feel firm when squeezed. If they are cracked, damaged, abraded, leaking, hard and brittle or soft and mushy, they should be replaced immediately.
The originally installed radiator, heater, bypass and fuel system hoses deteriorate in time and will rot away by the time your vehicle becomes a classic. Thoroughly inspect all hoses, including the fuel tank, fuel pump and cooling system hoses for cracks or damage by twisting and flexing the hose.
A classic rear-wheel drive vehicle will typically also have three brake hoses, one at each front wheel and one extending from the rear axle housing, which may accumulate a lot of road grime. Thoroughly clean these hoses before inspecting for damage, which usually appears near the end of the hose. Damage may be covered by dirt, so they can be nearing total failure before you see any leakage.
If your classic car has power steering, don’t forget to inspect those hoses as well. The pressure hose has crimped ends and is typically vehicle specific. The return hose is retained by clamps and is a standard oil hose you can buy by the foot.
Weak or damaged hoses can usually be identified and replaced cheaply and easily. Catching hose failures early can be the difference between a well-running car and being left stranded on the side of the road. To reduce the risk of hose failures, a best practice is to replace them on a set schedule as part of your regular maintenance program.
Don’t forget hoses can be clogged from within, even when they look clean on the exterior. If you’re having problems in a particular area of the vehicle, it’s worthwhile to remove and thoroughly clean and inspect or replace any related hoses.
Belts and Tires
Like hoses, belts and tires are made of rubber, which deteriorates over time. Drive belts should be inspected from above and below and if damaged, cracked or contaminated by oil, they should be replaced.
While many drivers ignore their tires, regular and frequent inspection should include tread wear and air pressure, which can also help identify a slow leak from abrasion or puncture damage. A quick glance will reveal a nail or screw, uneven tire wear or scalloping.
Radial tires should feel relatively smooth, and minor separations can be located by running your hand over the surface. Bumps or other abnormalities in the treads will lead to poor ride quality and continue to worsen until the tire fails. Visually inspect for any exposed steel on radial tires first, at which point you’ll replace the tire instead of running your hand across it.

Rust
Replace any steel brake lines that are heavily rusted and pitted. This is more common on classic vehicles that have spent time near the ocean or in northerly states. Most vulnerable are the line running front to rear in the frame and lines on the rear axle housing.
Check the exhaust system for a rusted-out muffler or pipes. Also examine the hangers, which are made of metal and rubber that will rust and rot. Consider removing, sanding and sealing the driveshaft if it is heavily rusted. One-piece shafts are typically easy to remove, but two-piece shafts require more effort, so review a shop manual before deciding to do it yourself.
A visual inspection can identify moisture on the outside of your fuel tank. Older tanks are subject to rusting both inside and out, and both problems have numerous remedies available. You don’t want to run rusty metal through your fuel system, so don’t ignore rust if discovered.
Under the Hood
Check the radiator while it is cool. On vehicles without an overflow system, maintain an antifreeze & coolant level about one inch short of the top of the fill neck within the radiator tank. On units with top and bottom tanks, verify that the core itself is covered with fluid. Vehicles with a plastic overflow reservoir should have hot/cold fill markings on them.
The brake master cylinder is typically located against the firewall on the driver’s side. Clean off any grime, then remove the top to check the fluid level. Check the shop manual or have someone press the brake pedal to help identify the master cylinder location if you are unsure.
If brake fluid is low, add the correct type of fluid, which is frequently DOT 3. If the fluid is murky, brown or black, or hasn’t been changed in the last two year, be sure to replace it. Don’t mix different brake fluids, as they are not always compatible, and it’s better to replace the fluid when changing compatible types. If there are leaks in the system be sure to correct them before changing fluid.
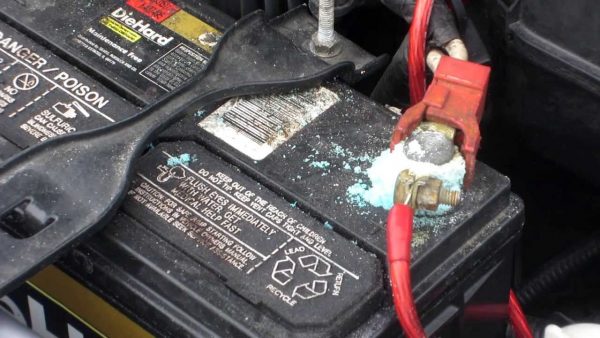
Check the water level in refillable batteries and top off with distilled water if needed. Inspect the terminals and clamps for corrosion. If they are discolored, disconnect and clean them with a wire brush until all connecting surfaces are shiny. Best practice is removing the ground cable first, which is the negative lead on most, but not all, post-1950s vehicles, so verify first.
Be careful when working on vehicle batteries, wear protective eyewear and keep other conductive tools and equipment away from the posts, including the opposite battery cable. If the cables are damaged, replace them. Finish with a coat of petroleum jelly on the posts and clamps to inhibit corrosion. If there is heavy white powdery corrosion on the battery or clamps the battery should be replaced.
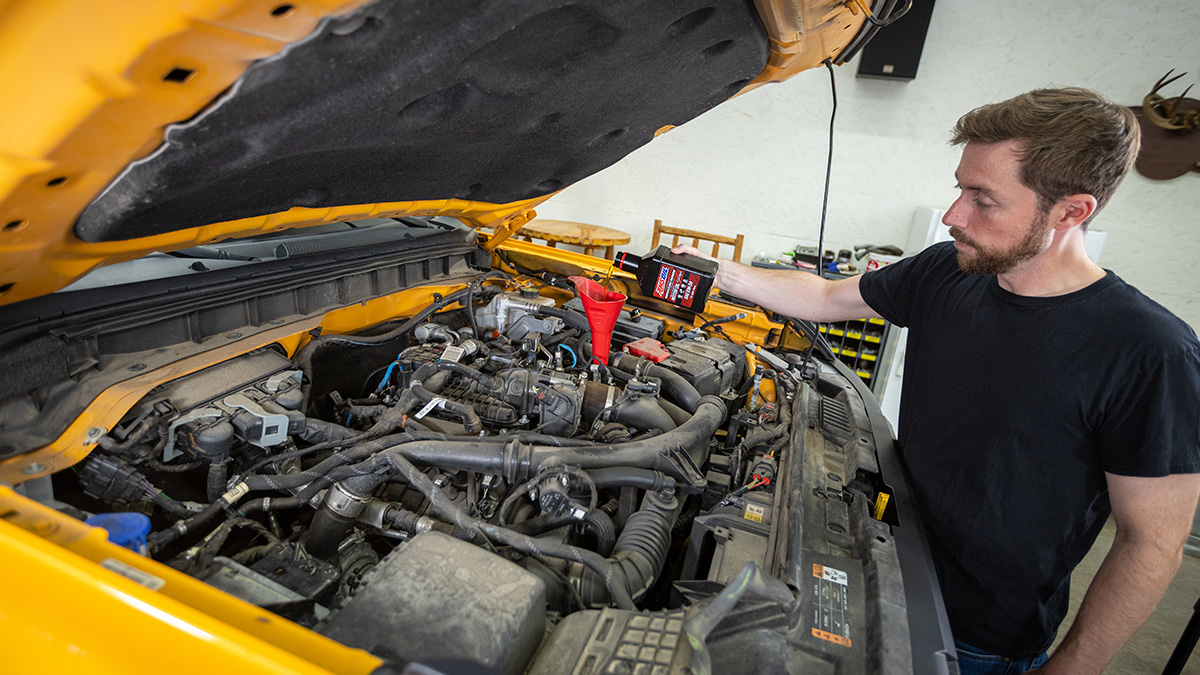
Also check the level of your transmission fluid and replace your cabin and engine air filter while you are at it.
Start Your Engine
Once the engine is running, check all hoses, the oil filter and drain plug for leakage. If there are no leaks, turn it off for a few minutes, then check the fluid level dipsticks to verify they are at the correct level. Congratulations, you have gained more vehicle mastery than the average motorist, a more reliable ride and invaluable peace of mind.
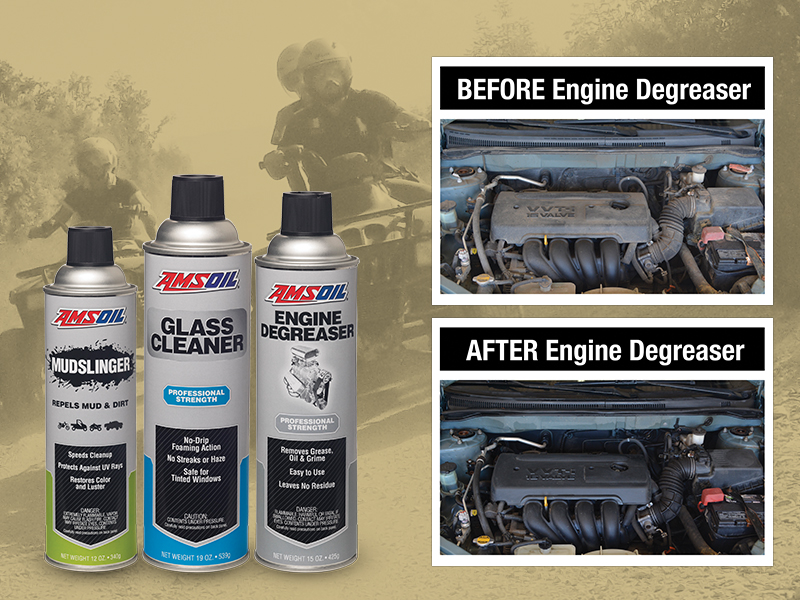
In case you missed all the hints and links above, AMSOIL offers all the premium lubrication and many of the parts needed to perform routine maintenance on both classic and modern cars and trucks.


Comments
AMSOIL Technical Writer and 20-year veteran of the motorcycle industry. Enjoys tearing things apart to figure out how they work. If it can’t be repaired, it’s not worth owning.
Share: