


Dennis Wey is a Team AMSOIL enduro champion based in The Netherlands near Amsterdam – Schiphol to be exact. He races the national class in all major enduro competitions in The Netherlands, including:
- Dutch Enduro Championship (ONK)
- Dutch Cross Country Series (DXCS)
- Dutch Enduro Sprint Championship
And he’s no slouch. His hefty list of two-wheeled accomplishments includes becoming the 2022 Dutch Enduro Sprint National Champion. We sat down with Wey to learn more about his life, what drives him to race and what’s next for him.
“I really love the fight and battle with man and machine on the track against other riders”

An interview with Dennis Wey
AMSOIL: Tell us a little more about yourself and your passion for racing.
DW: So basically, I grew up on the racetrack. My dad used to race rallycross cars around Europe. I was a little boy sniffing race fuels and playing with screwdrivers and wrenches. Then he bought this PW50 dirt bike and we started riding in Amsterdam. When our local motocross track disappeared, we had no choice but to look further. We started riding the Dutch Championship for youth. I had a hard time here because the level was too high for me.
Then around 16-years old I started to have fun on mopeds and few years later on motorcycles. So, dirt bikes weren’t my favorite thing anymore. Then after a few more years I really felt I had that passion for racing and wanted to race dirt bike again. I started riding the Cup Championship here where I came in second on my 125 two-stroke. The year after I started in the four-stroke class.
Just when everything felt in place, I had a hard crash and had a complicated fracture on my leg and knee. After a recovery I started riding motorcycles again. I bought a Supermoto for some stunt riding and a sport bike for the thrill. Then me and some friends went riding in some off-road events. This was all fun, but that passion for racing crawled slowly back in, and before I knew it, I decided to go race enduro full-time.
AMSOIL: How long have you been involved in racing?
DW: I could say my whole life. I really love riding motorcycles and watching motorsports. And the best thing is that I’m still learning and progressing to become a better racer.
AMSOIL: What is it about racing you love most?
DW: Just about everything – the thrill, the speed, the smell and sound of these machines. I really love the fight and battle with man and machine on the track against other riders. And I see some of the country’s most beautiful places to ride with my enduro and enjoy nature a bit.
AMSOIL: What is your most memorable race?
DW: Let’s just say the last four races of the Enduro sprint from 2022. The championship already came to an end this year and I can call myself the 2022 Dutch Enduro Sprint National Champion.
AMSOIL: What made you choose your current race bike?
DW: So, I currently own a Husqvarna TE 300 two-stroke from 2017 in full Supermoto and I bought myself a KTM EXC 300 two-stroke enduro from 2017. This is the last 300 with a carburetor so I trusted this the most to start with. It’s probably the cheapest and most easy to maintain enduro/dirt bike out there.
“I was a little boy sniffing race fuels and playing with screwdrivers.”

AMSOIL: What is one thing you would never overlook when choosing and maintaining your racing vehicle?
DW: You just need to check everything. From time to time I do rebuild the front or the back and clean and grease everything. But when I’m really out of time I replace the air filter, lubricate and check chain tension, bleed the front fork and check engine oil and coolant level.
AMSOIL: How long have you been using AMSOIL products?
DW: Just started using AMSOIL products in 2022 when General Cars and Parts in Ursem started to help me out with my passion.
AMSOIL: Which products do you particularly like?
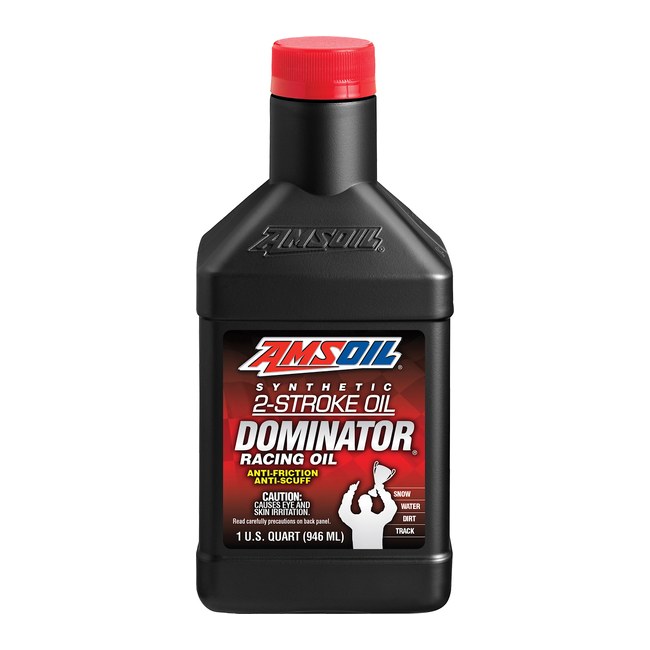
DW: The AMSOIL DOMINATOR® Racing Oil is what I currently use and mix in my fuel with both my enduro and Supermoto. Both are pushed to their full limits and I have never had any problem. And then the smell, hmmm.
AMSOIL: How have AMSOIL products helped you increase performance?
DW: They definitely improved performance for my bike as well as keeping it running at all times. It gave me the maximum power I needed to battle for podiums and to win the Enduro Sprint Championship.
Video transcript: How to Rebuild the Top End of a Two-Stroke Dirt Bike
Welcome to Tech Tips. This is a top-end rebuild of a two-stroke dirt bike. I’m Len Groom. One of the most commonly searched topics in power sports is how to rebuild the top end of a two-stroke dirt bike.
So today we’re going to put a top end in this bike. Here are the tools we’ll be using for today’s project. For your bike, check your service manual for specific sizes. Products we’ll be using today: AMSOIL’s DOMINATOR 2-Stroke Racing Oil and AMSOIL’s Antifreeze & Coolant, premixed at 50-50.
The first thing that you need to do is get the antifreeze out of the motor. So, to do that, loosen the radiator cap. Make sure it’s loose. Then you can open the drain and the water pump.
The next thing we’ll do is remove the plastic. Now, that’s going to vary from bike to bike. But in our case here it looks like we’re going to remove the seat, the gas tank, the front fairing, and the airbox. Okay.
Before you remove the gas tank, make sure that you move any clips holding the fuel line on and then slide the fuel line off carefully. There might be some fuel in there. The head pipe is held on with some exhaust springs. Now, there’s two ways you can do this.
You can use an actual exhaust spring puller. But, if you don’t have one of those, you can actually use a piece of wire looped through the spring to pull those springs off there. So we’re going to remove the exhaust in two pieces. We’re going to remove the slip-on or the tailpipe first.
One thing to note while you’re doing this job: It’s a good idea to look the bike over and see if there are any areas that need maintenance. Right here we’re seeing that the exhaust coupler is actually broken and leaking, so we’ll be sure to replace that when we’re going back together. What we’re doing now is removing any coolant lines that are attached to the cylinder head and the cylinder because ultimately we’re going to remove the cylinder and head. The carburetor’s got to go.
Start pulling some of these antifreeze hoses and we pull the spark plug. We’re removing anything that’s attached to it. When you remove the cylinder head, you don’t want to go around loosening the bolts in a clockwise pattern. Use a star pattern.
So you’re going to always try and work across from the bolt you just loosened. What that does is it loosens the head in a uniform pattern and then nothing is going to warp or crack. Before you can remove the cylinder, you have to disconnect the exhaust power valve. We’re going to rotate the clip out of the way.
We’re going to move the arm off to the side. That arm will slide right off and we’re set. That’s going to vary from model to model. So we’ve removed the cylinder head.
We’ve removed the radiators. We’ve disconnected the exhaust power valve. We’re to a point now where we’re ready to remove the cylinder, so let’s go ahead and do that. Okay.
We’ve got the cylinder off. We’re going to remove the piston now. As you can see, I’ve got a rag set up around the base of the cylinder. That will keep any dirt and, most importantly, the circlip for the piston from falling into the engine.
You wouldn’t want that to happen. So we’re going to take a pick. I’m using an angled pick to get in behind this retaining ring, this circlip as it’s called. You just can apply it over and pry it out of there.
Use your other finger to try and control it so that it doesn’t go flying once it’s loose. And just take it out of there. Once the circlip is removed, we’re going to push the wrist pin right out of the piston. Pull that right out and then very carefully lift the piston away.
Set the connecting rod down and you can pull the piston right out. Now that we have the bike disassembled, we’ve got a bunch of parts here on the table. What we need to do is get everything ready for cleaning and measuring because that’s a critical piece of this is to make sure that everything is clean for reassembly. But then we also need to take some measurements which we’ll cover in a bit.
So let’s go ahead and disassemble this cylinder. So we’re going to remove the intake side of this cylinder. This is the intake boot, and it holds the reeds. So we can get a look at the reeds while we’re doing this.
Once we get the screws out, go ahead and grab this entire piece and remove it. And now is a good time to take a look at the reed valves in case they’re chipped or broken. We’re checking those for any damage. And these look really good.
So now we’re going to renew remove the power valve assembly, and that’s going to vary bike to bike. So a service manual is always going to be handy in this situation. If you don’t have a service manual, make sure that you’re noting where what goes where. Take some pictures.
That’s always a good idea. So this thing runs in exhaust and it has a tendency to get dirty, so you need to clean it up. This one is very free moving. If you’re using good oil, this thing will stay moving.
The dirt shouldn’t be a big deal. You want to make sure that the valve is still smooth, which this one is. So once we get all the pieces out of it, go ahead and remove the main valve. Now we’re ready to clean.
Something that’s really important to remember when you’re doing a top-end rebuild is to get everything clean. If you do a bad job of cleaning it, you could leave some dirt in there that could lead to wear, could lead to premature failure. On the other side of that measuring, as long as you are staying inside of the tolerances that are set by the factory, you will be okay. You don’t really know what those are.
Does the bike have an aftermarket piston in it? Does it have a stock piston in it? Has it been bored? You need to understand all these things because any piston that you put in it is going to have a bore clearance requirement.
That’s the distance between the piston and the cylinder. If you get that wrong, the chances are it can seize or, if it’s too loose, the piston will actually rattle around in the cylinder and it’ll create all kinds of wear. Worst case scenario you break the skirt off the piston, and that’s a complete engine failure. So your measurements and your cleaning will make or break the top-end rebuild on a two-stroke dirt bike.
Once you get the parts clean, you need to take a good look at them. Is there anything that’s worn? Is there scratching? Is there any scuffing on anything?
And this piston actually is showing some signs of wear. We’ve got a couple of lines here on the intake side of the piston. That would indicate that this thing has been working, wearing a little bit. And sometimes that could be normal.
Sometimes that could be a sign of a problem. We understand that, once we look inside the cylinder, then we understand where those lines are coming from. This bike actually has a very narrow intake port design, and the piston is actually riding on some small bridges that puts a lot of pressure on that skirt; and it can create those marks. So in this case with this Suzuki* dirt bike those lines on the piston would be considered normal wear.
That’s something it’s going to do. So it’s nearing the end of its service life, so we will be using a new piston on this on the rebuild. What you’re looking at here are all the parts that we’ll be replacing for this top-end rebuild. We’ll start with the piston and everything that goes with the piston so the wrist pin, the roller cage, circlips and then, of course, the rings.
Next comes the cylinder. We will be replacing the base gasket and the head gaskets on the cylinder. It’s always important that you change those head gaskets because they can become flat spotted as they worked their way through their service life. And if you reuse them you could have a tendency for leakage.
After that, we’ll put on our side covers and associated linkage with the exhaust power valve. And then, lastly, when we put the exhaust pipe back on, if you remember, we found a broken coupler. So we will be replacing that coupler. One of the things we’ll do before we begin reassembly is actually resemble the exhaust power valve back into the cylinder after everything has been cleaned.
Something I always like to do is to assemble it on the bench first so that we have a good understanding of where all these different parts and pieces go. It can be scary looking, so setting it up like this always makes me feel better that, okay, I can get this thing back together. And, as always, have a diagram handy. As we start putting these parts back in for the power valve, we’ll make sure that we’re putting a thin film of the two-stroke oil we’re going to use in this bike.
And, in this case, we’re going to use the DOMINATOR Racing Oil for this dirt bike. So the exhaust power valve is now reassembled in the cylinder. All those parts and pieces that we showed you are back installed inside the cylinder. We’ve just finished putting the two covers on there.
We’ve replaced the gaskets. We’re ready to put the rings on the piston now. A couple things to note here. We measured this piston, and this piston measures out at 2.613 inches.
The old piston was 2.610 inches, which means in the factory service manual 2.610 is the service limit, meaning it’s out of tolerance. So the new piston measures bigger, and that’s what we want. That will ensure that our clearance between the cylinder and the piston is at factory tolerances, and we’re not going to have the piston rocking back and forth and we’re not going to have premature wear. So this engine now has measured out good, and we’re ready to reassemble it.
Now, that being said, we need to put the rings on the piston. They do not come installed. This is a dual-ring piston, and we need to install the rings, in this case with the letter that’s on the ring facing up. So to put the ring on the piston you simply want to get it started.
Lay it on the top of the piston. You’re going to very carefully bend one corner of the ring down, and you’re going to work that right around with your thumb and very gently help it down. So that’s there. Now it’s on the first.
We need to just move it down. To do that, just very gently pull that open with your finger very carefully. Just kind of work that ring right down around into that groove where it needs to be. Simple as that.
Any moves you make with the rings, you want to make sure that you’re being very careful. They can be fragile. So the next ring, letter up, lay it on top of the piston, bring it down and slowly work it around there with your thumb and then catch the end gap and help it down. Perfect.
Now we’re ready to install the piston on the connecting rod. We need to replace the rod bearing or the roller cage, and we’re going to get a good coating of oil on that. In this case we’re using the DOMINATOR Two-Stroke Oil from AMSOIL. Get a good coating of oil on that.
You’re going to insert that roller cage into the rod. We’ve got shop rags over the engine case here and that’s on purpose. That’s to be sure that nothing drops into the case while we’re putting the piston on the connecting rod. We actually installed one of the circlips just to make things easier and less risk of a circlip dropping into the engine case.
So this way, once we’re in the bike, we only have to install one of the circlips that holds the wrist pin into the piston. So the piston goes in the bike a certain way. There is an arrow on the top of the piston that points to the exhaust side. So wherever the exhaust will be on the motorcycle, that’s where this arrow is going to point.
In this case, the arrow is pointing forward. So we bring the piston in. We grab the connecting rod. Notice how I have the wrist pin started.
That’s this part here. I already have it started. We’re going to bring the piston on top of that rod and then lightly press the wrist pin in until it seats against get that circlip, and that’s what we’ve done. The piston is now installed on the connecting rod.
Now we need to install the last circlip, and that will keep the wrist pin from working its way out of the engine. What we need to do now is lubricate this piston. Now, there’s many schools of thought on how much oil you should apply to the piston. What we’re going to do in this case, we’re going to put a light coating of oil on the skirt and around the ring surfaces, and that should provide adequate lubrication at startup.
Plus it will also allow the rings to begin seating. Now we’re ready to install the cylinder. So the first step to installing the cylinder is to install the new base gasket. We’ve got a brand-new base gasket here so very carefully work it over the piston and then over the cylinder studs.
And our power valve mechanism also has to fit through there, so make sure it drops down nice and even, looks nice and flat. Once again, make sure that piston doesn’t drop. The next thing we’ll install our dowel pins for our cylinder, and those fits right on the corners. Now we’re ready to bring the cylinder down on top of this piston.
You want to make sure you get a good coating of two-stroke oil in the cylinder. I’ve already done that in this case. Just use your finger to apply it and get a nice even film all the way around. If you notice on a two-stroke piston the ring end gap has to be over a ring locating pin that’s on the intake side of the piston.
So the backside of the piston there are two locating pins, and the rings need to line up with those. They’re all lined up. Ready to bring the cylinder down. We’ve got our power valve linkage is kind of partway started in the hole.
We’ve got the cylinder generally located over the top of that piston. What we want to do, then, is make sure that our ring end gaps stay lined up. And we’re going to come in there. We’re going to squeeze the rings with our fingers.
It’s kind of a delicate process. But in this case there’s really no nice way to do it. Sometimes there’s a little bit of a struggle. You just have to be very patient.
Take your time. There really isn’t a tool available to compress these rings on a two-stroke like there is for a four-stroke piston, so you have to use your fingers. Kind of get them worked in there. Don’t force it.
You can see we’ve got it started. Once you get it started, it’s a good idea to check around and make sure that everything is lined up. So it’s started and it’s sitting there. We want to make sure that our linkage is lined up.
And then make sure that we’re lined up on the bolts, and we can very carefully start bringing the cylinder down on top of the locating studs. Okay. Cylinder’s in place. Kind of do one last check.
Linkage looks good. Locating studs are where they need to be. It’s fitting flush. We’ve got the cylinder on.
Okay. We’re using a torque wrench to tighten the cylinder nuts. This bike calls for 27.5 foot-pounds. Check your service manual to figure out what the torque spec is for your particular bike.
Now that all the cylinder nuts are torqued, we can connect the power valve linkage. So that’s this rod. It pushes right back in. Snap the lock down.
Locked in so that’s done. Now we can put this cover back on. Okay. We’re going to put the cylinder head back on, but first we need to put the O-rings or the head gaskets back in.
The smaller one in the center; the larger one goes around the outside. Be sure that it’s seated in the groove or you could pinch it and break it. So it’s very important that these O-rings are seated in the groove. Make sure that all the O-rings are still in the grooves.
Push that cylinder head back down on top of there, and we’re ready to bolt it down. This bike calls for 18 foot-pounds, so I’ve got the wrench all set. We’re going to use a star pattern to torque these bolts down. Okay.
We’re ready to reinstall the carburetor. During an engine rebuild, it’s always a good time to check for other areas that we could maintain. And, in this case, we did some maintenance on the carburetor. I changed the bowl gasket and I also replaced the needle in the seat assembly in this carburetor.
So this is what actually does the metering of the fuel into the bowl. It’s a wear item. It had been in this bike for a while, so we decided to go ahead and replace it. That eliminates any risk of leaking or issues.
One of the other things that you’ll notice that we did is we replaced all of the vent tubes on this carburetor. The old vent tubes had gotten old and stiff, and that’s what happens to this type of tubing after it’s been used for a while. We’ve replaced it with Tygon tubing that’s designed for use with gasoline, and it won’t get stiff over time and cracked. So we’ve replaced everything.
We’re ready to install this carburetor. Okay. We’ve got the bike all back together. Everything looks good.
Time for the big test. Okay. We’ve got to make sure we turn the fuel on. We’ve already filled it with antifreeze.
Remove our exhaust plug and we’re ready to go. So here’s the fuel. I’m going to turn the fuel on. Couple things to remember.
As soon as the bike fires, you want to look around it, make sure that there’s nothing leaking. Put your hand on the radiator. Make sure that it’s starting to build some heat. You don’t want to let it idle forever at a low idle.
You kind of want to move the throttle around a little bit. You don’t need to rev it to the moon. Just kind of move that idle speed up a little bit and down a little bit just to make sure that the engine doesn’t run at one constant speed. That will help break the rings in.
That’ll ensure that you don’t run into problems. Well, there you have it: top-end rebuild on a two-stroke dirt bike. It’s not too bad. Just remember: Be patient.
Have a diagram. If you’re concerned about getting something back together, take some pictures. Just work your way through it and you’ll get there. For that first tank of gas, I would say take it easy, no extended wide-open throttle, no extended periods of idling.
Just take it easy on the bike through that first tank and you should be okay after that. You’re ready to race. Thanks for watching. We’ll see you next time.
Comments
Brad Nelson is an AMSOIL Technical Writer II who develops content about lubricant technology, product performance and vehicle maintenance. He works with engineers and product specialists to translate testing, application requirements and approved performance claims into clear customer guidance. Nelson’s work includes AMSOIL Blog articles, AMSOIL Magazine features and technical explanations concerning motor oils, gear lubricants, vehicle systems and maintenance practices.
Share: